

How to Clear Up Disc Space on Mac
Today in 2021, MacBooks are more spacious than ever. The new MacBook Air comes with a 256-GB hard drive. But no amount of storage seems to be enough as the ever-inflating digital media is taking over our hard drives. Cloud servers are only a partial answer to that. They aren't getting cheaper and consume insane amounts of the world's electricity. So if you want to take a load off your drive and help the planet, you should teach yourself a couple of storage-keeping tricks. Let's go.
What's causing low disk space on your Mac?
Before you begin to free up disk space, let's identify what's taking it up. From the Apple Menu in the upper left-hand corner of your screen, select About This Mac and then click the Storage tab in the window that opens. You'll get a handy, color-coded graph that looks like this:
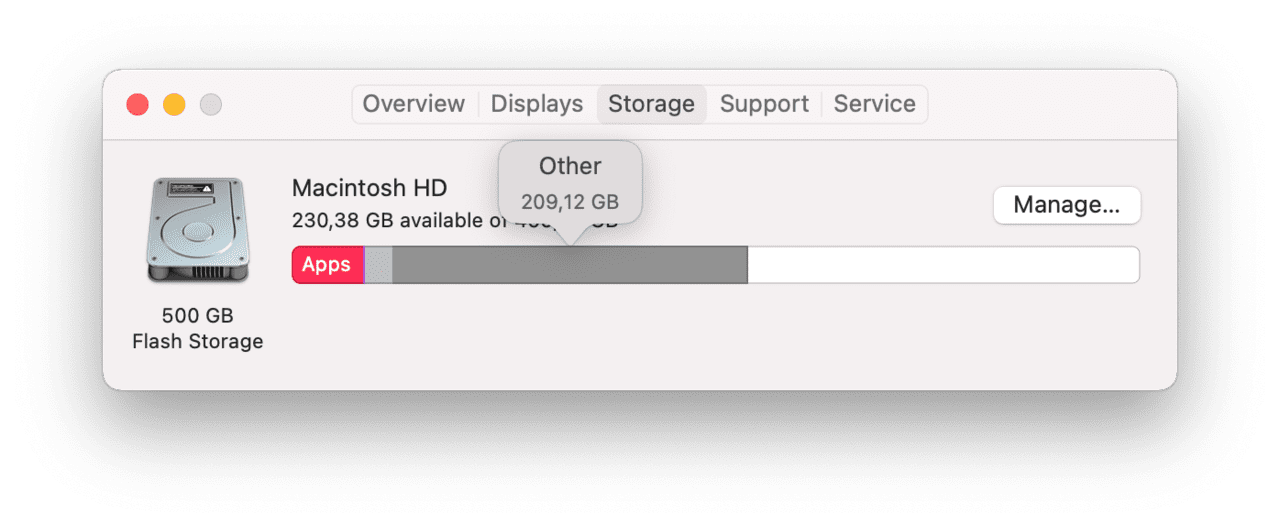
In the above example, you can see that apps, audio files, and "other" (for details on what this "other" category consists of, look here) are taking the most significant amount of space.
It's nice to see what's stored on your Mac, and even nicer to be able to browse the folders that contain the files themselves. Now that you've identified what's on your drive let's free up some space.
How to increase disk space on your Mac
There are several options here, so let's go through a few.
1. Remove large and old files
Often the files that end up taking the most space are tucked away in "cold storage" on your computer. These are big movies, photos, or the like that you rarely look at but can't part with, either. In this case, archiving the files and moving them to an external drive is a good way to free up storage space on your Mac.
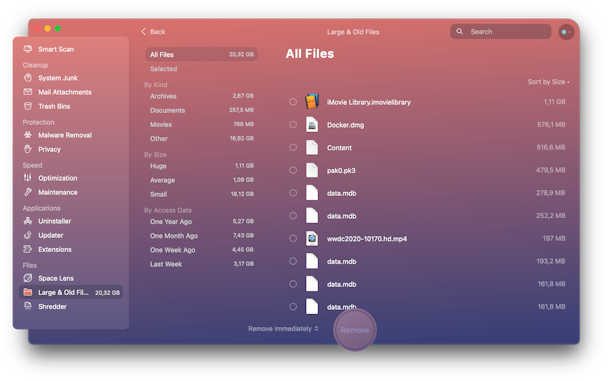
Locating huge neglected files can be a pain, but it gets super easy with the CleanMyMac X app. It has a dedicated Large & Old File finder. It will help you find massive files and sort them by size to define the largest ones quickly.
You can download the free version of CleanMyMac X here.
As the name suggests, it finds files that occupy a lot of space on your disk but haven't been opened for a long time. You can quickly review these files right in the app and decide which ones you want to remove. It's a really handy feature if you have a lot of heavy stuff piled up.
2. Empty Trash
Review your Trash bin's contents one last time before you empty it. Press Command and right-click the Trash folder on your Trash icon. Then, click Empty Trash to remove everything.
Tip
Use Command-Option-Delete to delete any folder immediately, bypassing Trash.
3. Clean up the Downloads folder
Files love to hide in your Mac's Downloads folder. Old disk images, random photos, unused extensions, ZIP files… they're all in there, not making a sound. Hiding. ? Go to Finder and browse what's sitting in your Downloads, wasting space on your disk. Anything unnecessary can be dragged to the Trash.
4. Delete duplicate folders and files
How many times do we copy or download things twice? Like many users, I would prefer to have a backup twin of my important files. But that often ends up in my files being quadrupled…or what do they call a 4th or 5th copy of the same folder?
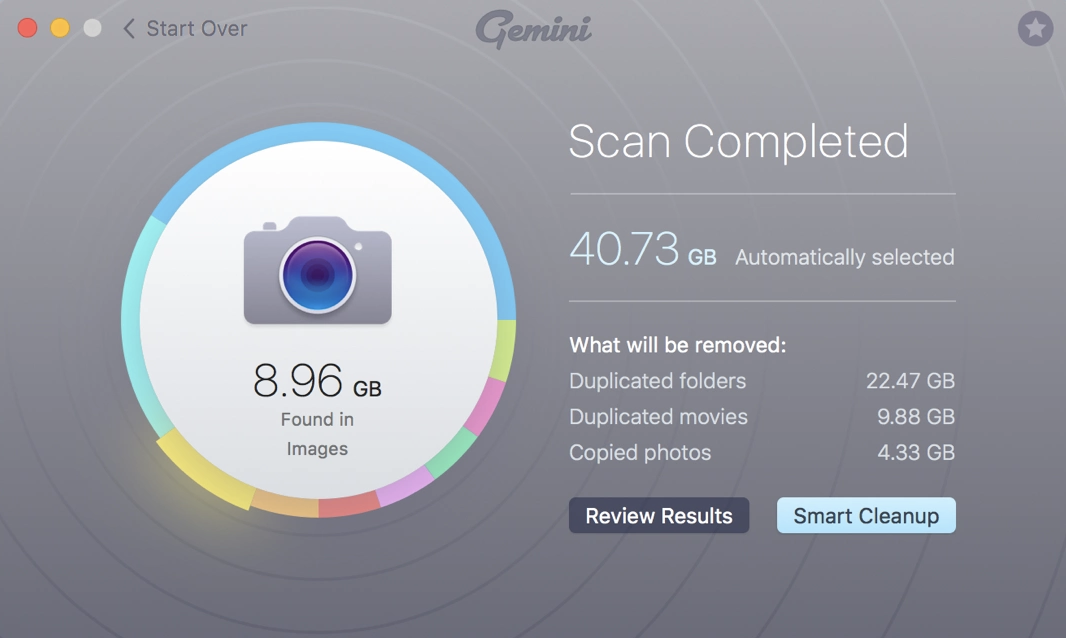
To effectively remove duplicate files and make space on Mac, you can use Gemini 2. This is how this app looks.
You can download this little duplicate finder here.
Gemini 2 analyzes potential duplicates by many criteria, not just the name of the file. It searches for:
- Duplicate folders
- Duplicate movies
- Similar images
5. Learn to use Optimized Storage
Optimized Storage is the built-in feature of the macOS. It's a sorting algorithm that shows different categories of files on your Mac for review and removal.
- Click the Apple Menu > About This Mac > Storage.
- Choose "Manage…"
By far, the most-space demanding of your files will be Applications.
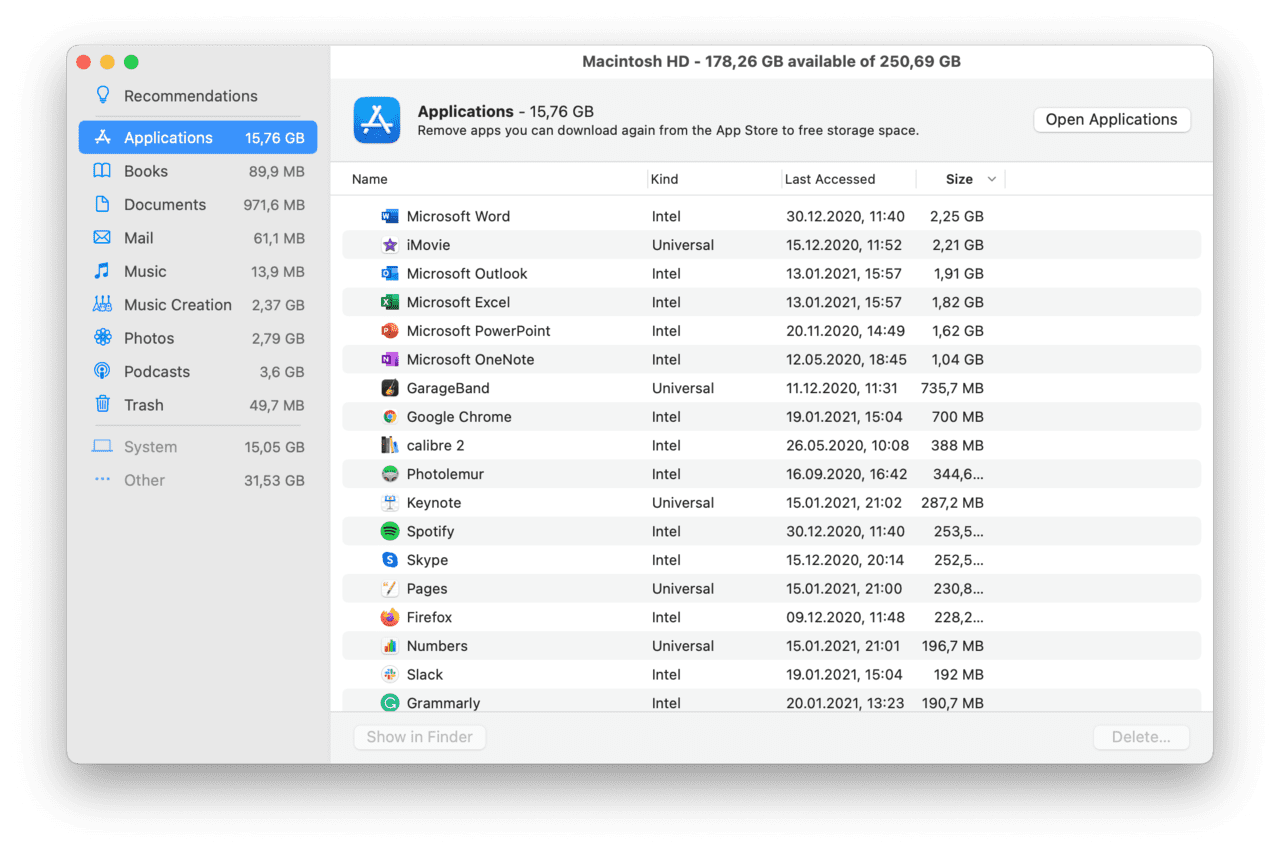
Using the quick tabs above, you will decide what is there you can toss away. Make sure also to check Recommendations (on top of the list). There are a couple more space-saving options there.
6. Uninstall unused applications
If you're like me, you often try an app "...just to see what it does". While that's fun, it frequently results in a slew of forgotten apps. It's a good practice to set a reminder to review your Applications folder and clean out the ones you no longer use. However, note that simply dragging an app into your Mac's trash doesn't eliminate all of its related files.
CleanMyMac X's Uninstaller feature, on the other hand, leaves no leftover pieces behind, which means more available space on your Mac. CleanMyMac X finds every app-related document and file, no matter where it has been tucked away and deletes it from your Mac.
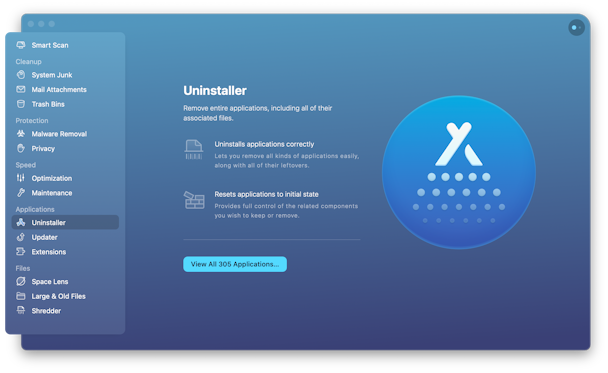
And speaking of setting up a reminder, CleanMyMac's scheduler will handle that task for you, too. Just tell it how often you'd like to be prompted to give your Mac a good cleaning and leave the rest to the app.
7. Delete your Desktop screenshots
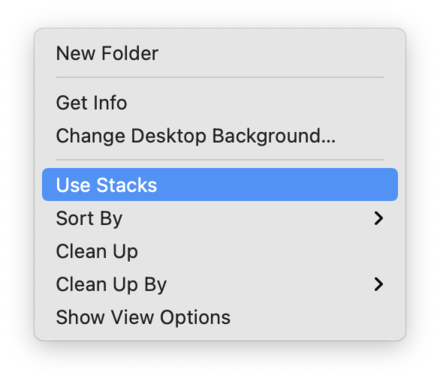
Mac's Desktop is where you keep screenshots by default. With a feature called "Stacks," you can organize your Desktop into clearly labeled folders. One of such folders will be Screenshots, which you can later remove in one sweep.
- Go to your desktop.
- Right-click somewhere in the middle of your Desktop.
- Select "Use Stacks"
Now you should see the Screenshots folder with all your screengrabs neatly stuffed inside. Drag this folder to the Trash and empty it.
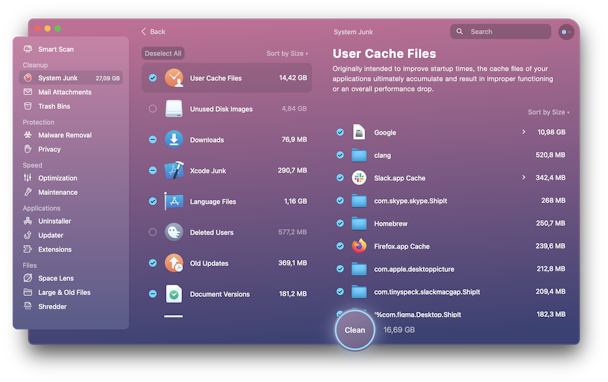
8. Get rid of system junk
It's not just your files that are hogging disk space — it's also useless system files like logs, cache, unused binaries, old iOS backups and installers, and what not. Fortunately, CleanMyMac can find and eliminate them all to make low disk space a thing of the past, at last.
System junk is comprised of:
- User cache files
- Application cache
- Broken downloads
- Unused .DMG installers
As you can see, the "User cache" category alone can recover about 3 GB of space. So the best way to free up space on Mac is to start with this type of files.
With just a few clicks, you'll discover what's where and what's ripe for deletion. The best way to free up hard drive space is to run CleanMyMac X and wave goodbye to space-hogging files. Don't worry. You won't miss them. Hopefully, you managed to clear a lot of disk space — drop by for more Mac housekeeping tips. 😉
How to Clear Up Disc Space on Mac
Source: https://macpaw.com/how-to/increase-available-disk-space-on-mac
0 Response to "How to Clear Up Disc Space on Mac"
Post a Comment